Farm Learning
A No-Weld Steel Entrance Anyone Can Build
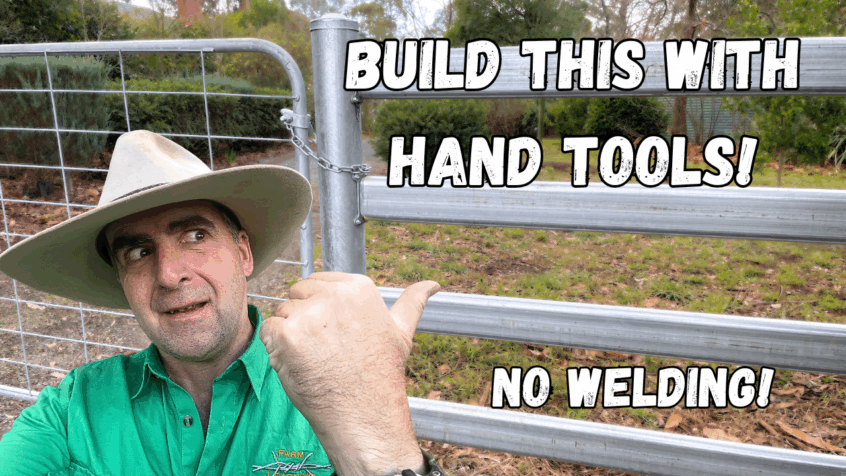
Build a Smart Cattle Rail Entrance With Just Hand Tools
Is your front gateway looking more “bush mechanic” than “pride of the property”? You’re not alone.
Many Australian farmers and small block owners love the look of solid steel cattle rail, but the idea of hiring in heavy equipment, chasing down a welder, or learning to MIG isn’t exactly appealing. And if you’re like me—juggling time, budget, and a long list of other jobs—it can be tempting to patch up the old timber gate just one more time.
But what if I told you that you can build a steel cattle rail entrance—with ground anchors, properly spaced rails, and a fully hung gate—in a single day, using just basic hand tools?
This week on the Farm Learning channel, I tackled my own gateway. It was underwhelming. Knackered, even. And with a few clever tools and a brilliant bracket system from Rotech, I turned it into a job I’m proud to drive through.
Why Steel Cattle Rail?
There’s no denying the strength and clean look of steel cattle rail. It’s durable, it’s low-maintenance, and it gives the front of your property that professional finish. The problem? Traditional cattle rail entrances usually mean:
- Cutting and welding
- Concrete footings
- Heavy machinery
- Contractors (if you can get them)
That’s where Rotech’s modular post and rail system changes the game. No welding, no cutting, no concrete. Just smart design, solid materials, and a well-thought-out kit.
How It Works: Post Driving and Anchors
The foundation of any gate is its posts. With the Rotech system, we’re not talking about digging massive holes or pouring concrete. Instead, we drive the posts in by hand, using a post driver and a clever little ground achor kit.
Each DriveTight post includes slots for ground anchor brackets, which accept standard steel offcuts as angled piles. These are driven in diagonally, locking the post in place like a star picket on steroids.
And here’s a safety reminder: before driving anything into the ground, get a services locator in. Trust me—you don’t want to find a fibre optic cable or a high-pressure gas line the hard way.
The DIY Approach: Alignment and Spacing
This build doesn’t just hold together—it looks right. To achieve that, a few important tips:
- Pre-mark your fence line before removing the old structure.
- Use a free laser level app to make sure your posts are perfectly aligned.
- Double-check your gate spacing (25mm clearance on each side is ideal).
- Use a tie-down strap hack to gently adjust posts that aren’t quite level.
There’s nothing worse than finding out your pre-cut rails are too short—or worse, having a gap you can’t fill. So getting your post spacing bang-on is key.
Fitting the Rails and Gate
Once the posts are in, fitting the rails is a one-man job. The RailTight End Brackets come with curved rail supports that adjust for slight slopes, making them perfect for uneven ground. They suit most common pipe sizes (80NB to 120NB) and rails line up perfectly.
Finally, with the bolt on round post hinge set, hanging the gate is as simple as tightening a few bolts. No welding. No cutting. No fuss. Even the gate pin in the kit is adjustable.
Final Result: Built in a Day
The end result? A sturdy, stylish cattle rail entrance you’d be proud to show off—and it was built in a single day. No fancy tools. No special skills. Just a bit of elbow grease and the right materials.
Thinking of upgrading your own entrance?
Watch the full video here:
👉 DIY Steel Cattle Rail Entrance — No Welding Needed
Tools and Products Used:
- Rotech Cattle Rail Brackets and Gate Kit
- Post driver
- Standard spade
- Magnetic level
- Tie-down strap (for the post hack)
- Free laser level app
- Steel post offcuts for ground anchors
Why This Matters
On-farm improvements like this don’t just make life easier—they make a statement. Whether you’re welcoming guests, guiding stock, or just pulling in the drive after a long day, your entrance says something about your place.
And now, with kits like these, building one that lasts doesn’t have to cost a fortune or require specialist skills.
Want More DIY Farm Builds?
Subscribe to the Farm Learning YouTube channel for weekly content on fencing, regenerative farming, and smart property upgrades that save you time and money.
Or explore more DIY builds on the blog homepage.